Ben Smithgall
Welcome to the web blog
Bit pusher at Spotify. Previously Interactive News at the New York Times, U.S. Digital Service, and Code for America.
Implementing React Drag and Drop -- Getting Started
February 25, 2017
As I referenced in my last post, I am working on a project I’m calling biblio, which is a way for me to track books that I am in the process of reading, have read, and want to get. There are a lot of other things that do this already, so what I’m looking to do is to have a trello-style interface that lets me move cards that represent books between different states easily. Because I’m also looking to do this with new technology as a learning exercise, I am aiming to build this with React on the frontend.
To get the drag-and-drop card functionality, I am using the popular React Drag and Drop higher-order functions to get everything working. I want to walk through the process I used to get everything working. This assumes that you have some basic knowledge of how React works (I would highly recommend thinking in React).
Background – naming and component structure
Our Biblio component is comprised of Shelves, which act as columns in a grid. Each Shelf has a set of Works. We want to be able to do the following interactions:
- Move a work up and down in its existing shelf (moving only along the Y axis)
- Moving a work laterally across shelves (moving only along the X axis)
- Moving a work up and down on a different shelf (moving along both the X and Y axes)
In all of these interactions, we will also want to have a “placeholder” that shows where our card is going to go.
We’ll also need to somehow send this positional information back to the server so that the server can know when things change, but that will be a post for a different day.
Thinking about where to plug in drag-and-drop
React DND uses higher-order functions to plug directly into existing components. There are only two functions available to us:
DragSource: As it sounds, theDragSourcewraps a component and allows you to drag it.DropTarget: Similarly, theDropTargetis a destination for variousDragSources.
In our case, the DragSource is going to be a Work. As we drag it around, we are going to add placeholders to show where it will go if we drop it. This means that we are going to need to have two targets – Works themselves, and the placeholders. We could make the full list (or container) a drop target, but this will lead to challenges later with figuring out how to re-order the cards from a Redux action.
Wiring up a Work as a DragSource
To start, let’s take a look at our unwired component:
class Work extends React.Component {
  render() {
    const { id, title, author } = this.props;

    return (
      <div
        id={id}
        className="work"
      >
        <div className="content">
          <h1>{title}</h1>
          <p>{author}</p>
        </div>
      </div>
    );
  }
}

Work.propTypes = {
  id: React.PropTypes.number.isRequired,
  title: React.PropTypes.string.isRequired,
  author: React.PropTypes.string.isRequired,
}

export default Work
This is a pretty standard React component. From here, we can attach a DragSource:
import React from 'react';
import { DragSource } from 'react-dnd';

class Work extends React.Component {
  render() {
    const { id, title, author } = this.props;

    return connectDragSource(
      <div
        id={id}
        className="work"
      >
        <div className="content">
          <h1>{title}</h1>
          <p>{author}</p>
        </div>
      </div>
    );
  }
}

Work.propTypes = {
  id: React.PropTypes.number.isRequired,
  title: React.PropTypes.string.isRequired,
  author: React.PropTypes.string.isRequired,
}

const workDragSource = {
  beginDrag: function() {
    return {}
  }
}

export default DragSource('DRAG_WORK', workDragSource, function(connect) {
    return {
      connectDragSource: connect.dragSource(),
    };
  }),
)(Work);
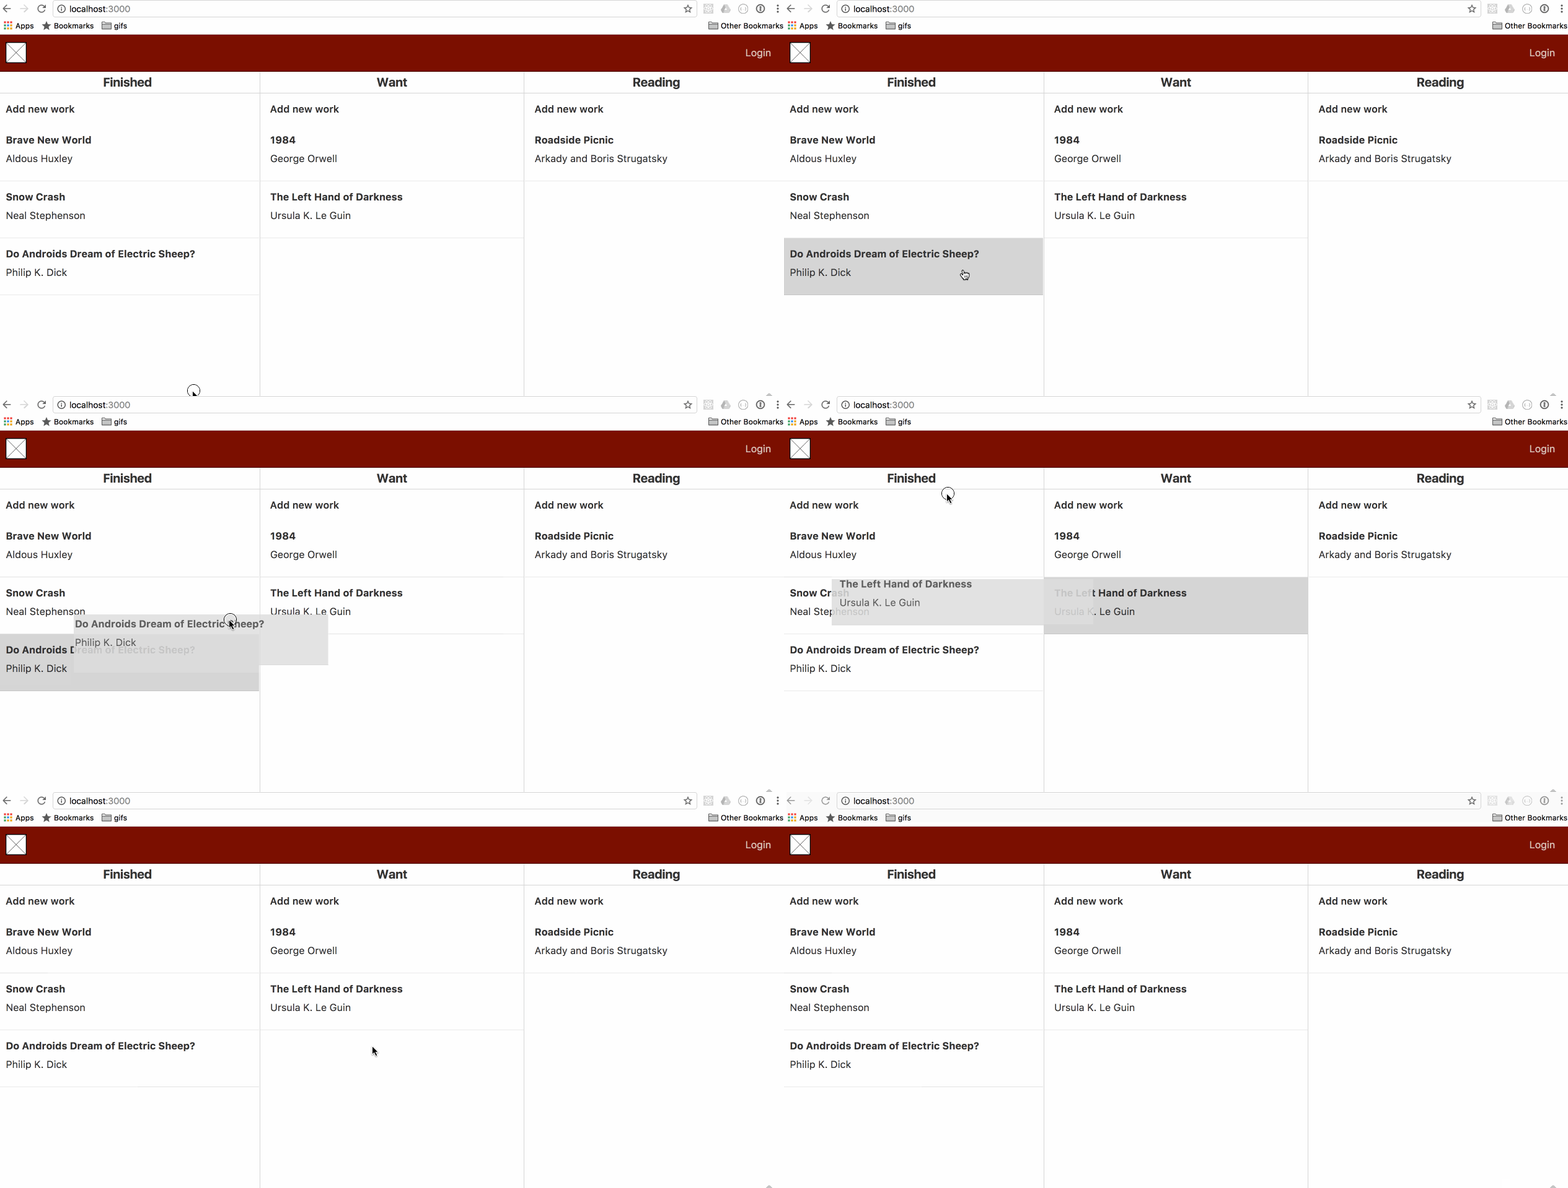
This is the simplest possible example. This will enable our work to be dragged around on the page:

Adding a placeholder
After we pick up the component and start moving it around, we want to show the user where they would be dropping it. To do this, we are going to attach the other of our higher-order functions: a DropTarget. Looking at the signature for a DropTarget, we will want to use the hover method of the spec function.
First, though, we need to modify our beginDrag method so that when we are hovering, we will know which element we are dragging:
const workDragSource = {
  beginDrag: function(props) {
    return {
      id: props.id
      position: props.position
    }
  }
}
Now, we can get an object of the shape: {id: workId, position: workPosition} whenever we call monitor.getItem(). Now, let’s wire up our drop target source function to fire an event up when we are hovering in the right position. Note that props here refers to the properties of the component that we are hovered over:
const workDropTarget = {
  hover: function(props, monitor, component) {
    const item = monitor.getItem();
    const draggedPosition = item.position;
    const hoverPosition = props.position;

    // find the middle of things
    const hoverBoundingRect = findDOMNode(component).getBoundingClientRect();
    const hoverMiddleY = (hoverBoundingRect.bottom - hoverBoundingRect.top) / 2;
    const clientOffset = monitor.getClientOffset();
    const hoverClientY = clientOffset.y - hoverBoundingRect.top;

    // don't move until we are halfway over the card
    if (draggedPosition < hoverPosition && hoverClientY < hoverMiddleY) return;
    if (draggedPosition > hoverPosition && hoverClientY > hoverMiddleY) return;

    // insert a display placeholder at an appropriate position
    const dragDir = draggedPosition > hoverPosition ? 'up' : 'down';
    props.setPlaceholder(draggedPosition, hoverPosition, dragDir);
  }
}
The setPlaceholder method is a typical redux event that just sends the positions of the various things and the direction being dragged down to the reducer. That way, in the component that wraps the Work, we can iterate through and drop the placeholder in the correct location:
export default class WorkContainer extends React.Component {
  render() {
    const { works, shelfNumber, moveWork } = this.props;
    const { placeholderIndex, currentDragged, dragDir, setPlaceholder } = this.props;

    const worksWithPlaceholder = [];
    works.forEach(function(work, idx) {
      if (placeholderIndex === idx && idx !== currentDragged && dragDir === 'up') {
        worksWithPlaceholder.push(<div key="placeholder" className="placeholder" />);
      }
      worksWithPlaceholder.push(
        <WorkContainer
          id={work.id}
          key={work.id}
          position={idx}
          title={work.title}
          author={work.author}
          moveWork={moveWork}
          shelfNumber={shelfNumber}
          work={work}
          setPlaceholder={setPlaceholder}
        />
      );
      if (placeholderIndex === idx && idx !== currentDragged && dragDir === 'down') {
        worksWithPlaceholder.push(<div key="placeholder" className="placeholder" />);
      }
    });

    return (
      <div className="bb-shelf-list">
        {worksWithPlaceholder}
      </div>
    );
  }
}
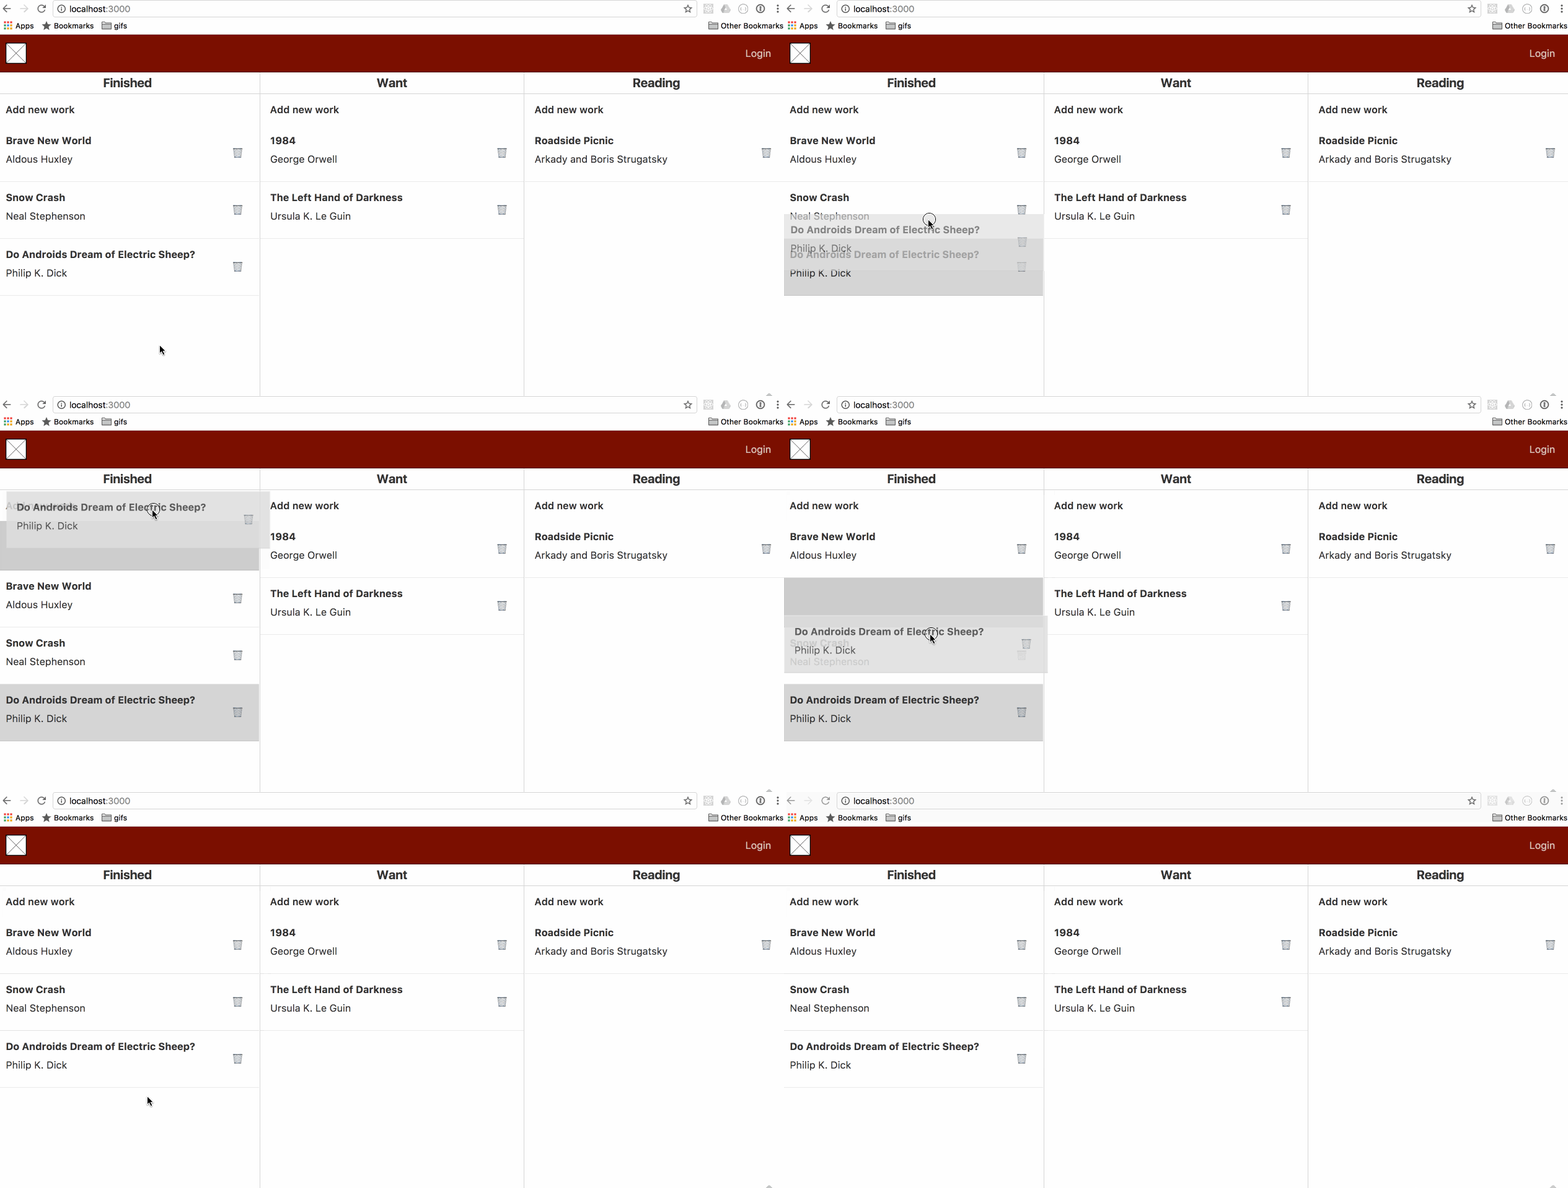
With that, we should have working placeholders. It will look something like this:

In the next post, we’ll talk about adding a drop event, and improving performance.


